LoRaWAN IoT Sensor Station
The goal is to develop a senseBox sensor station with LoRaWAN module. The data will be sent via the free network TheThingsNetwork to the internet. The measured values of the sensors for illuminance & UV, temperature & humidity and air pressure are to be transmitted. Afterwards the data can be displayed on the platform tago.io in addition to the openSenseMap.
Basics
TheThingsNetwork is a community-based initiative to establish a global LPWAN Internet of Things network. Data can be transmitted over the network free of charge and over long distances. You can find more information here. Before you start the project, check if a gateway - the LoRaWan - is available in your area. The easiest way to do this is via the website ttnmapper.
Structure
The sensors are connected to the I2C/Wire ports of the senseBox MCU with JST-cables. The LoRa-Bee is plugged into the XBEE1 slot.
Registration at TheThingsNetwork and on the openSenseMap
For this example, you do not start from nothing in programming, but build on a code generated by the openSenseMap. However, to generate the code correctly, you will need some information from TheThingsNetwork.
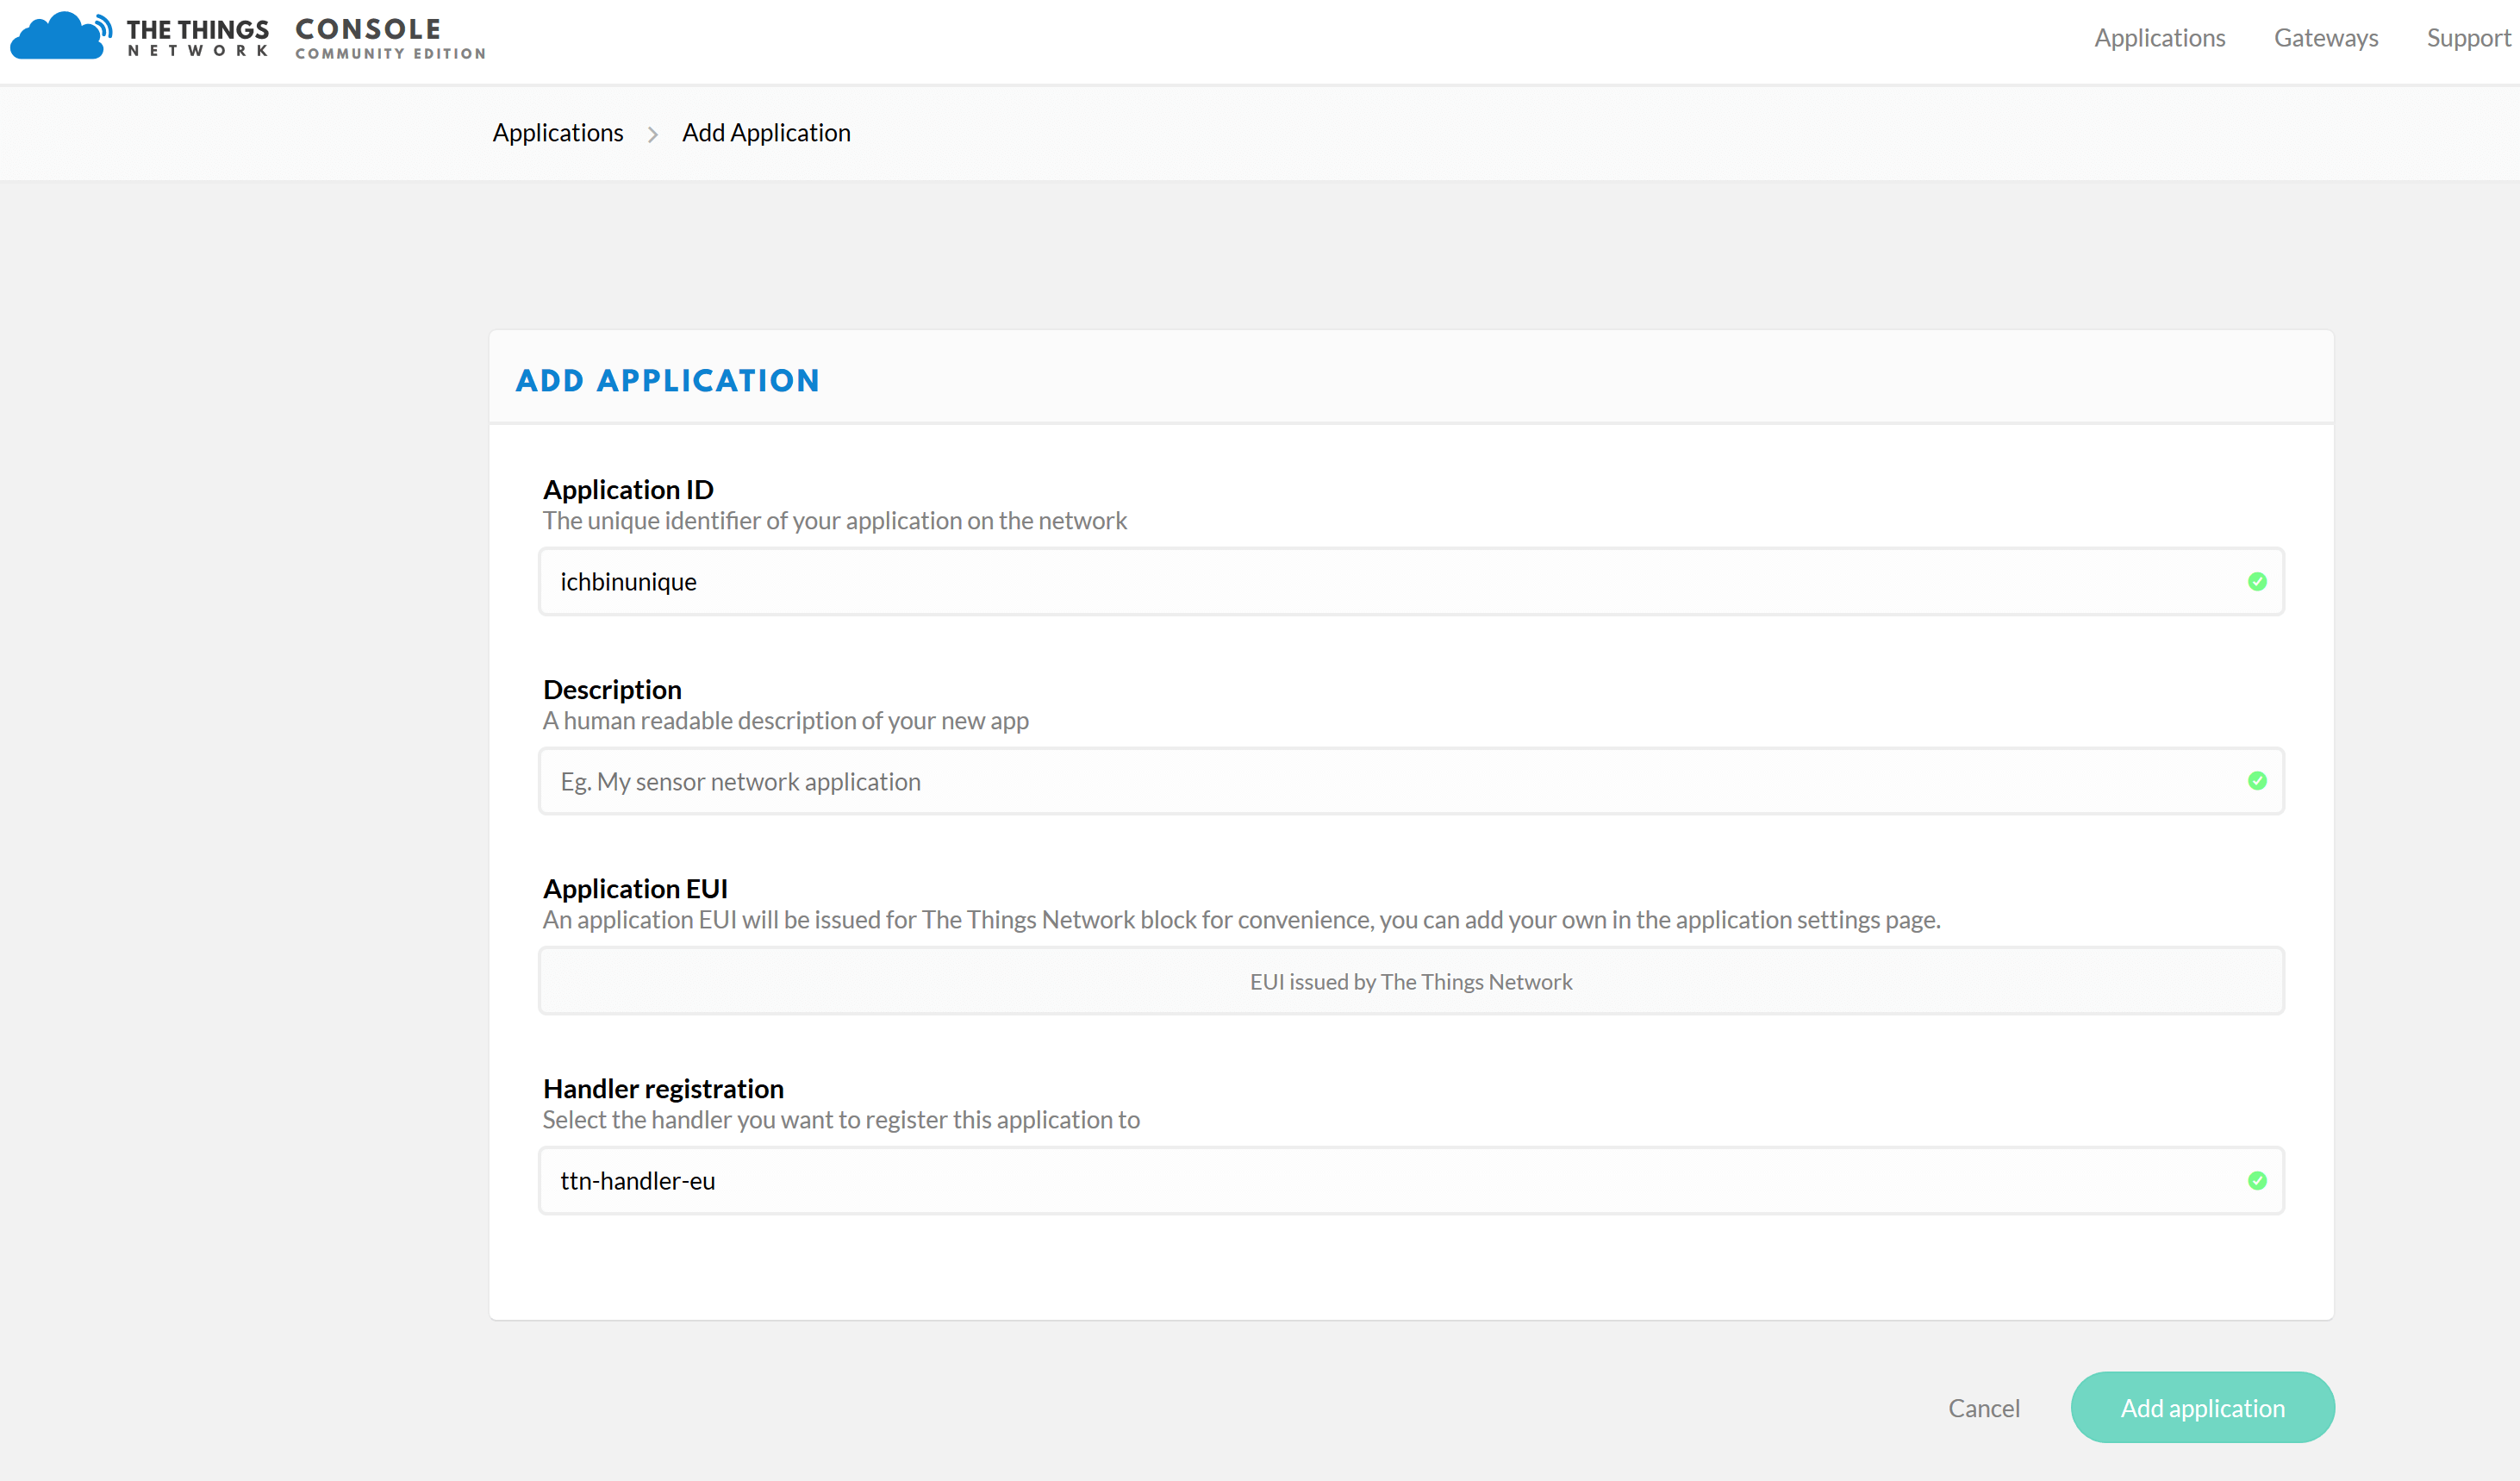
Register on TheThingsNetwork and create an application
Visit the website thethingsnetwork.org and create an account. If you are logged in, you will see a “Learn” option in the header of the homepage. Click on it and select “Applications” and then “add application” on the following page. Enter an “Application ID” there, which is unique. Leave all other options unchanged.
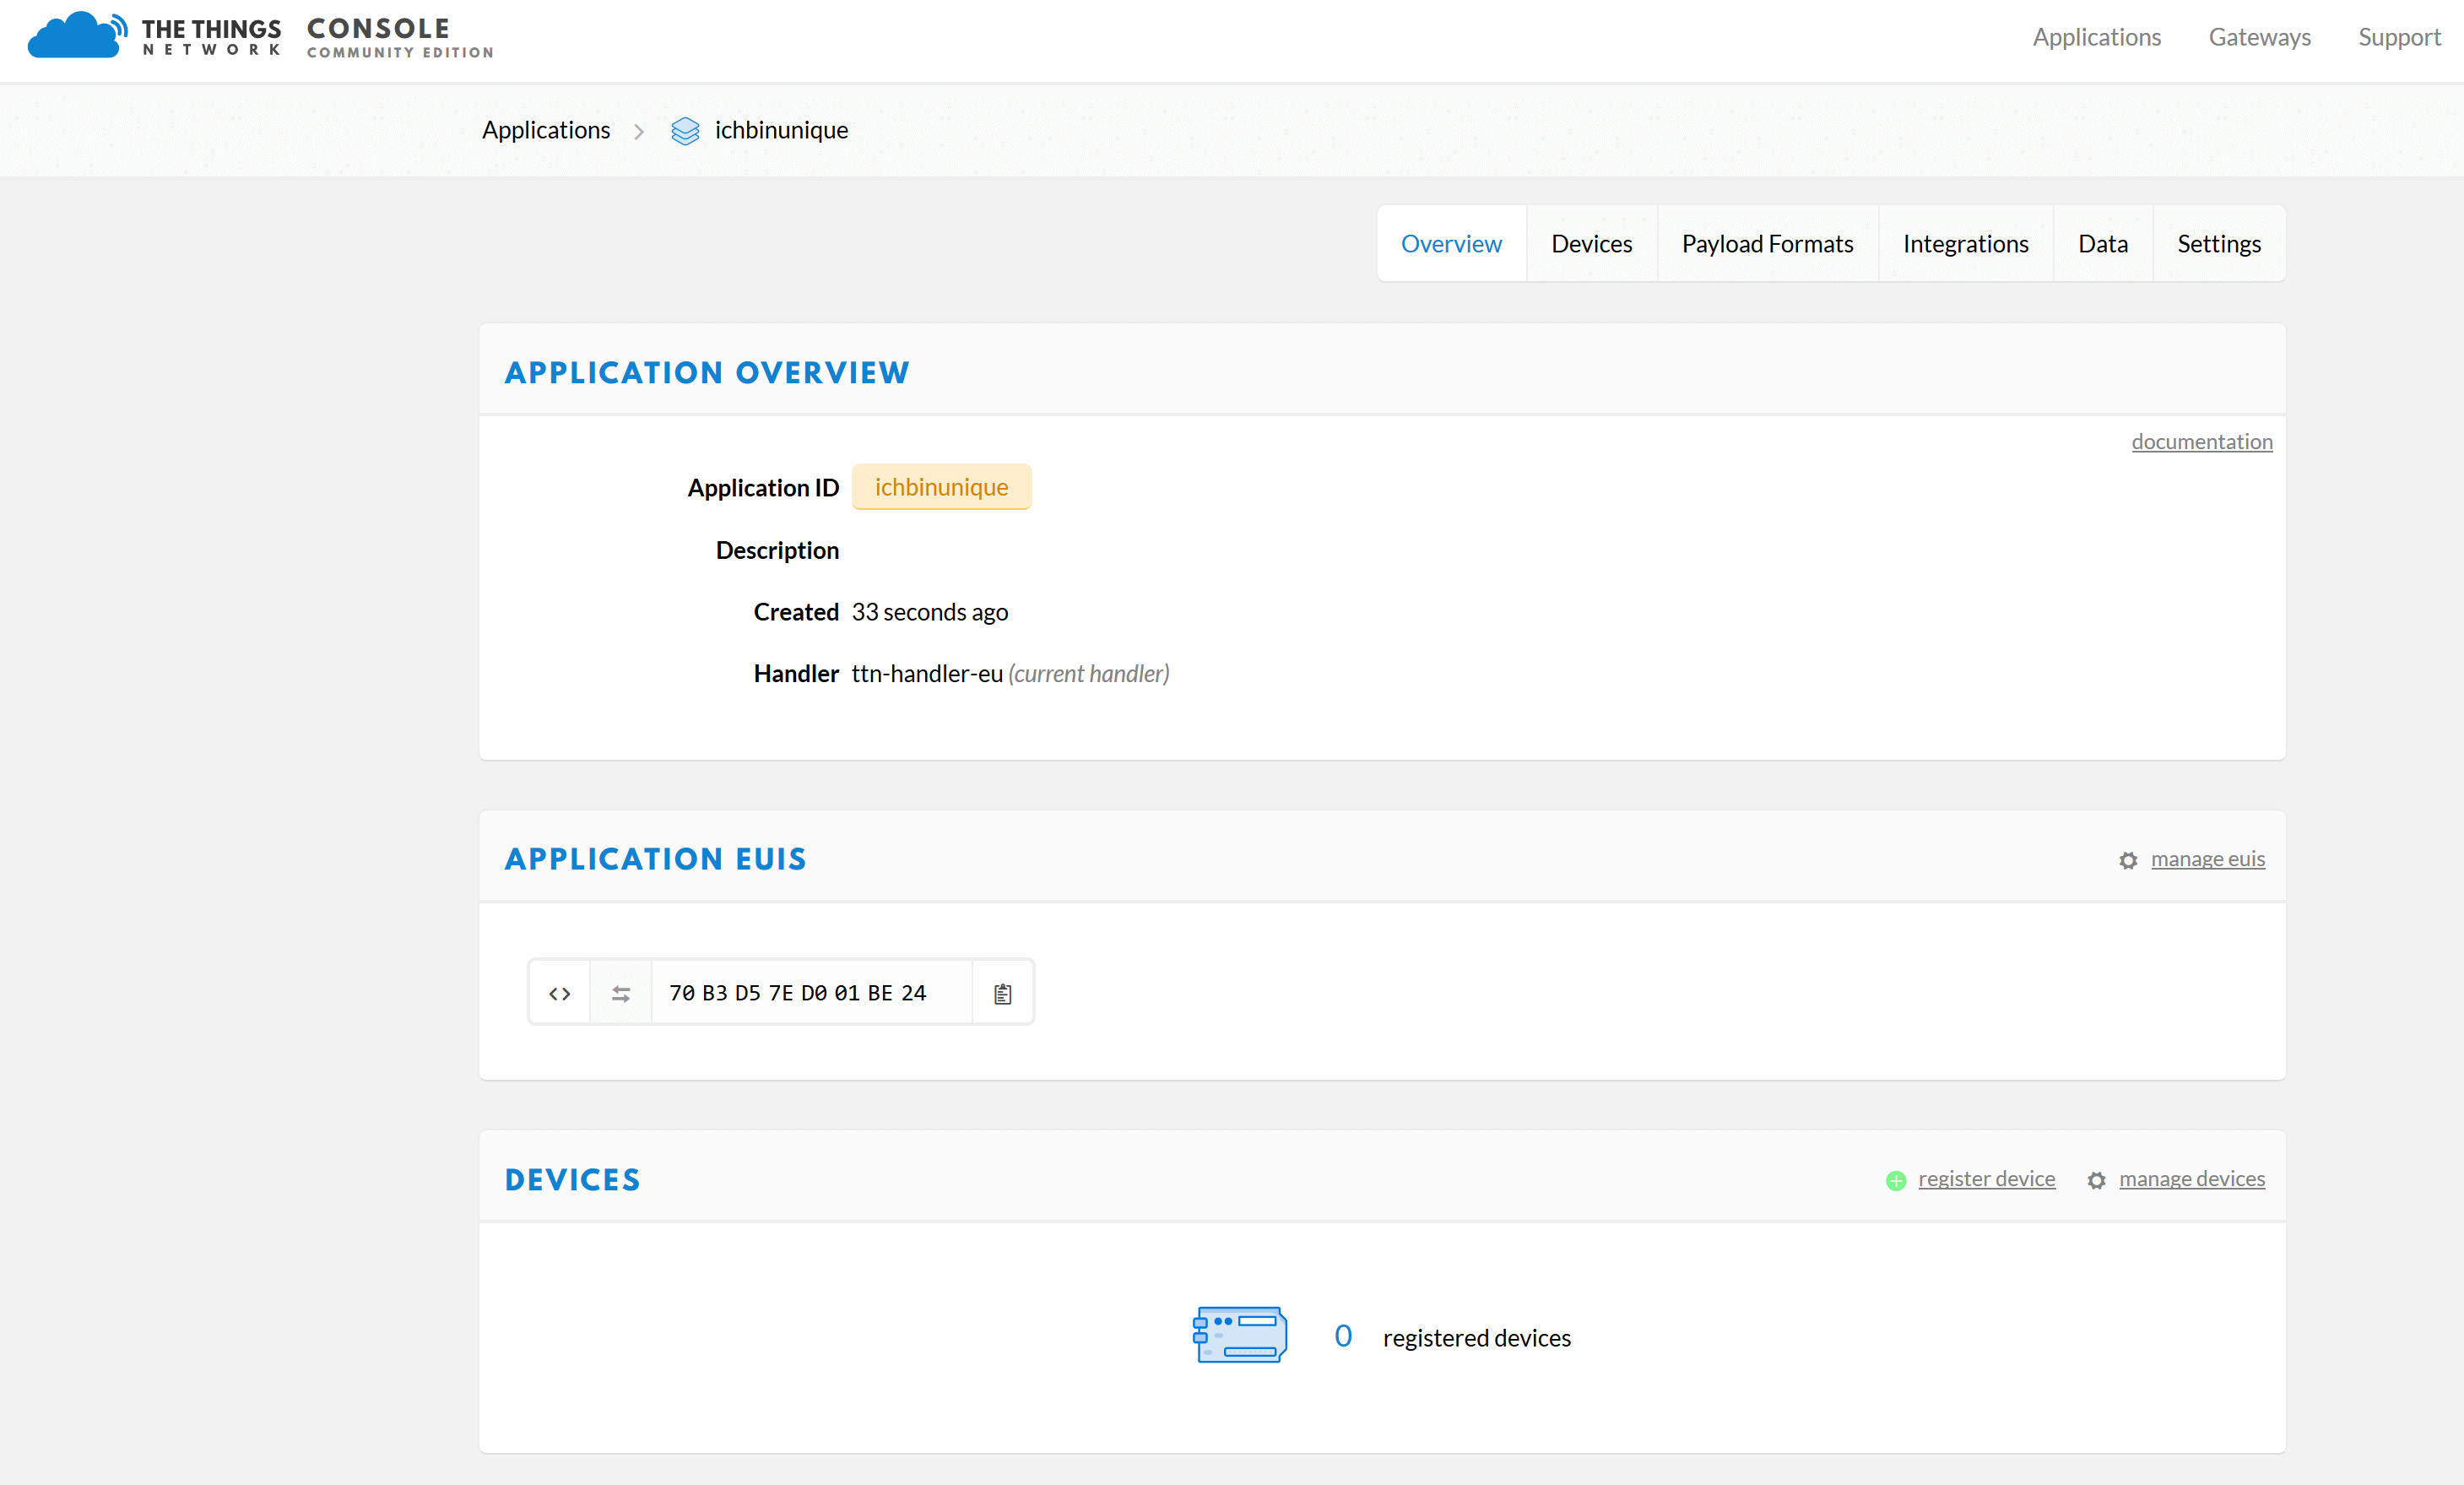
Then you will get an overview with the selected “Application ID” and the “Application EUIS”.
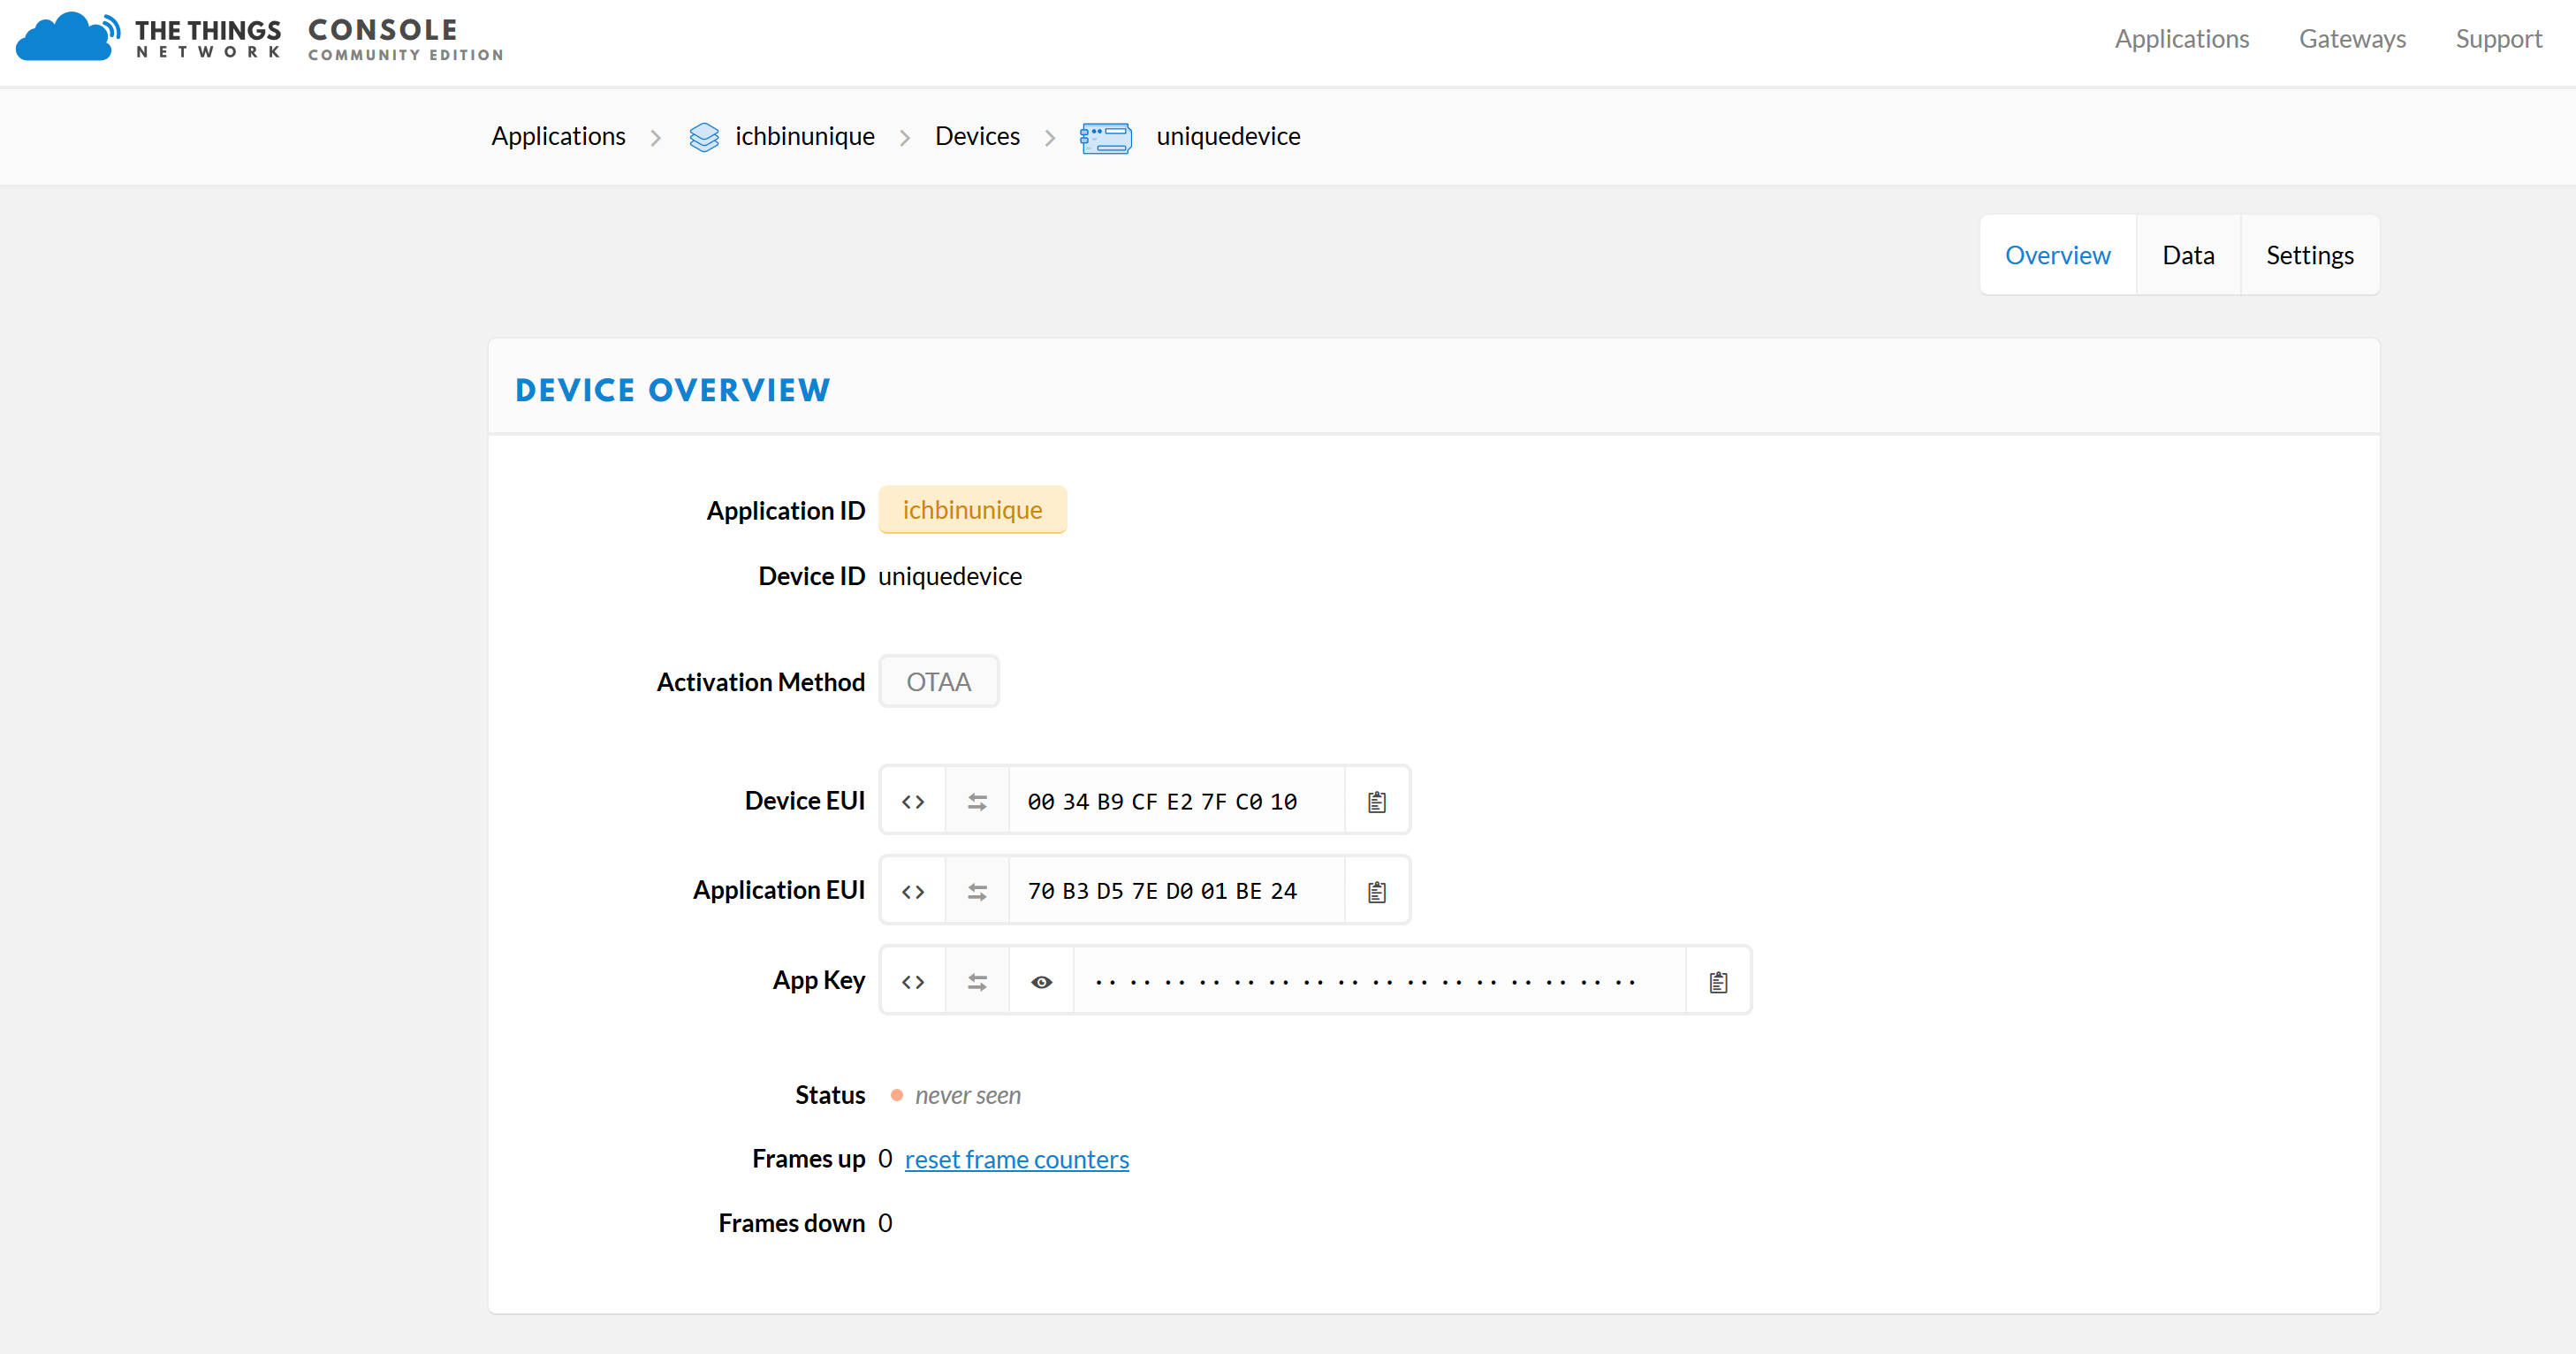
Now you have to add a Device in your new application. To do this, go to the “register device” section under “Devices”. Give your Device a “Device ID”. By clicking on the looped arrows (“generate”) at “DeviceEUI” a DeviceEUI is generated automatically.
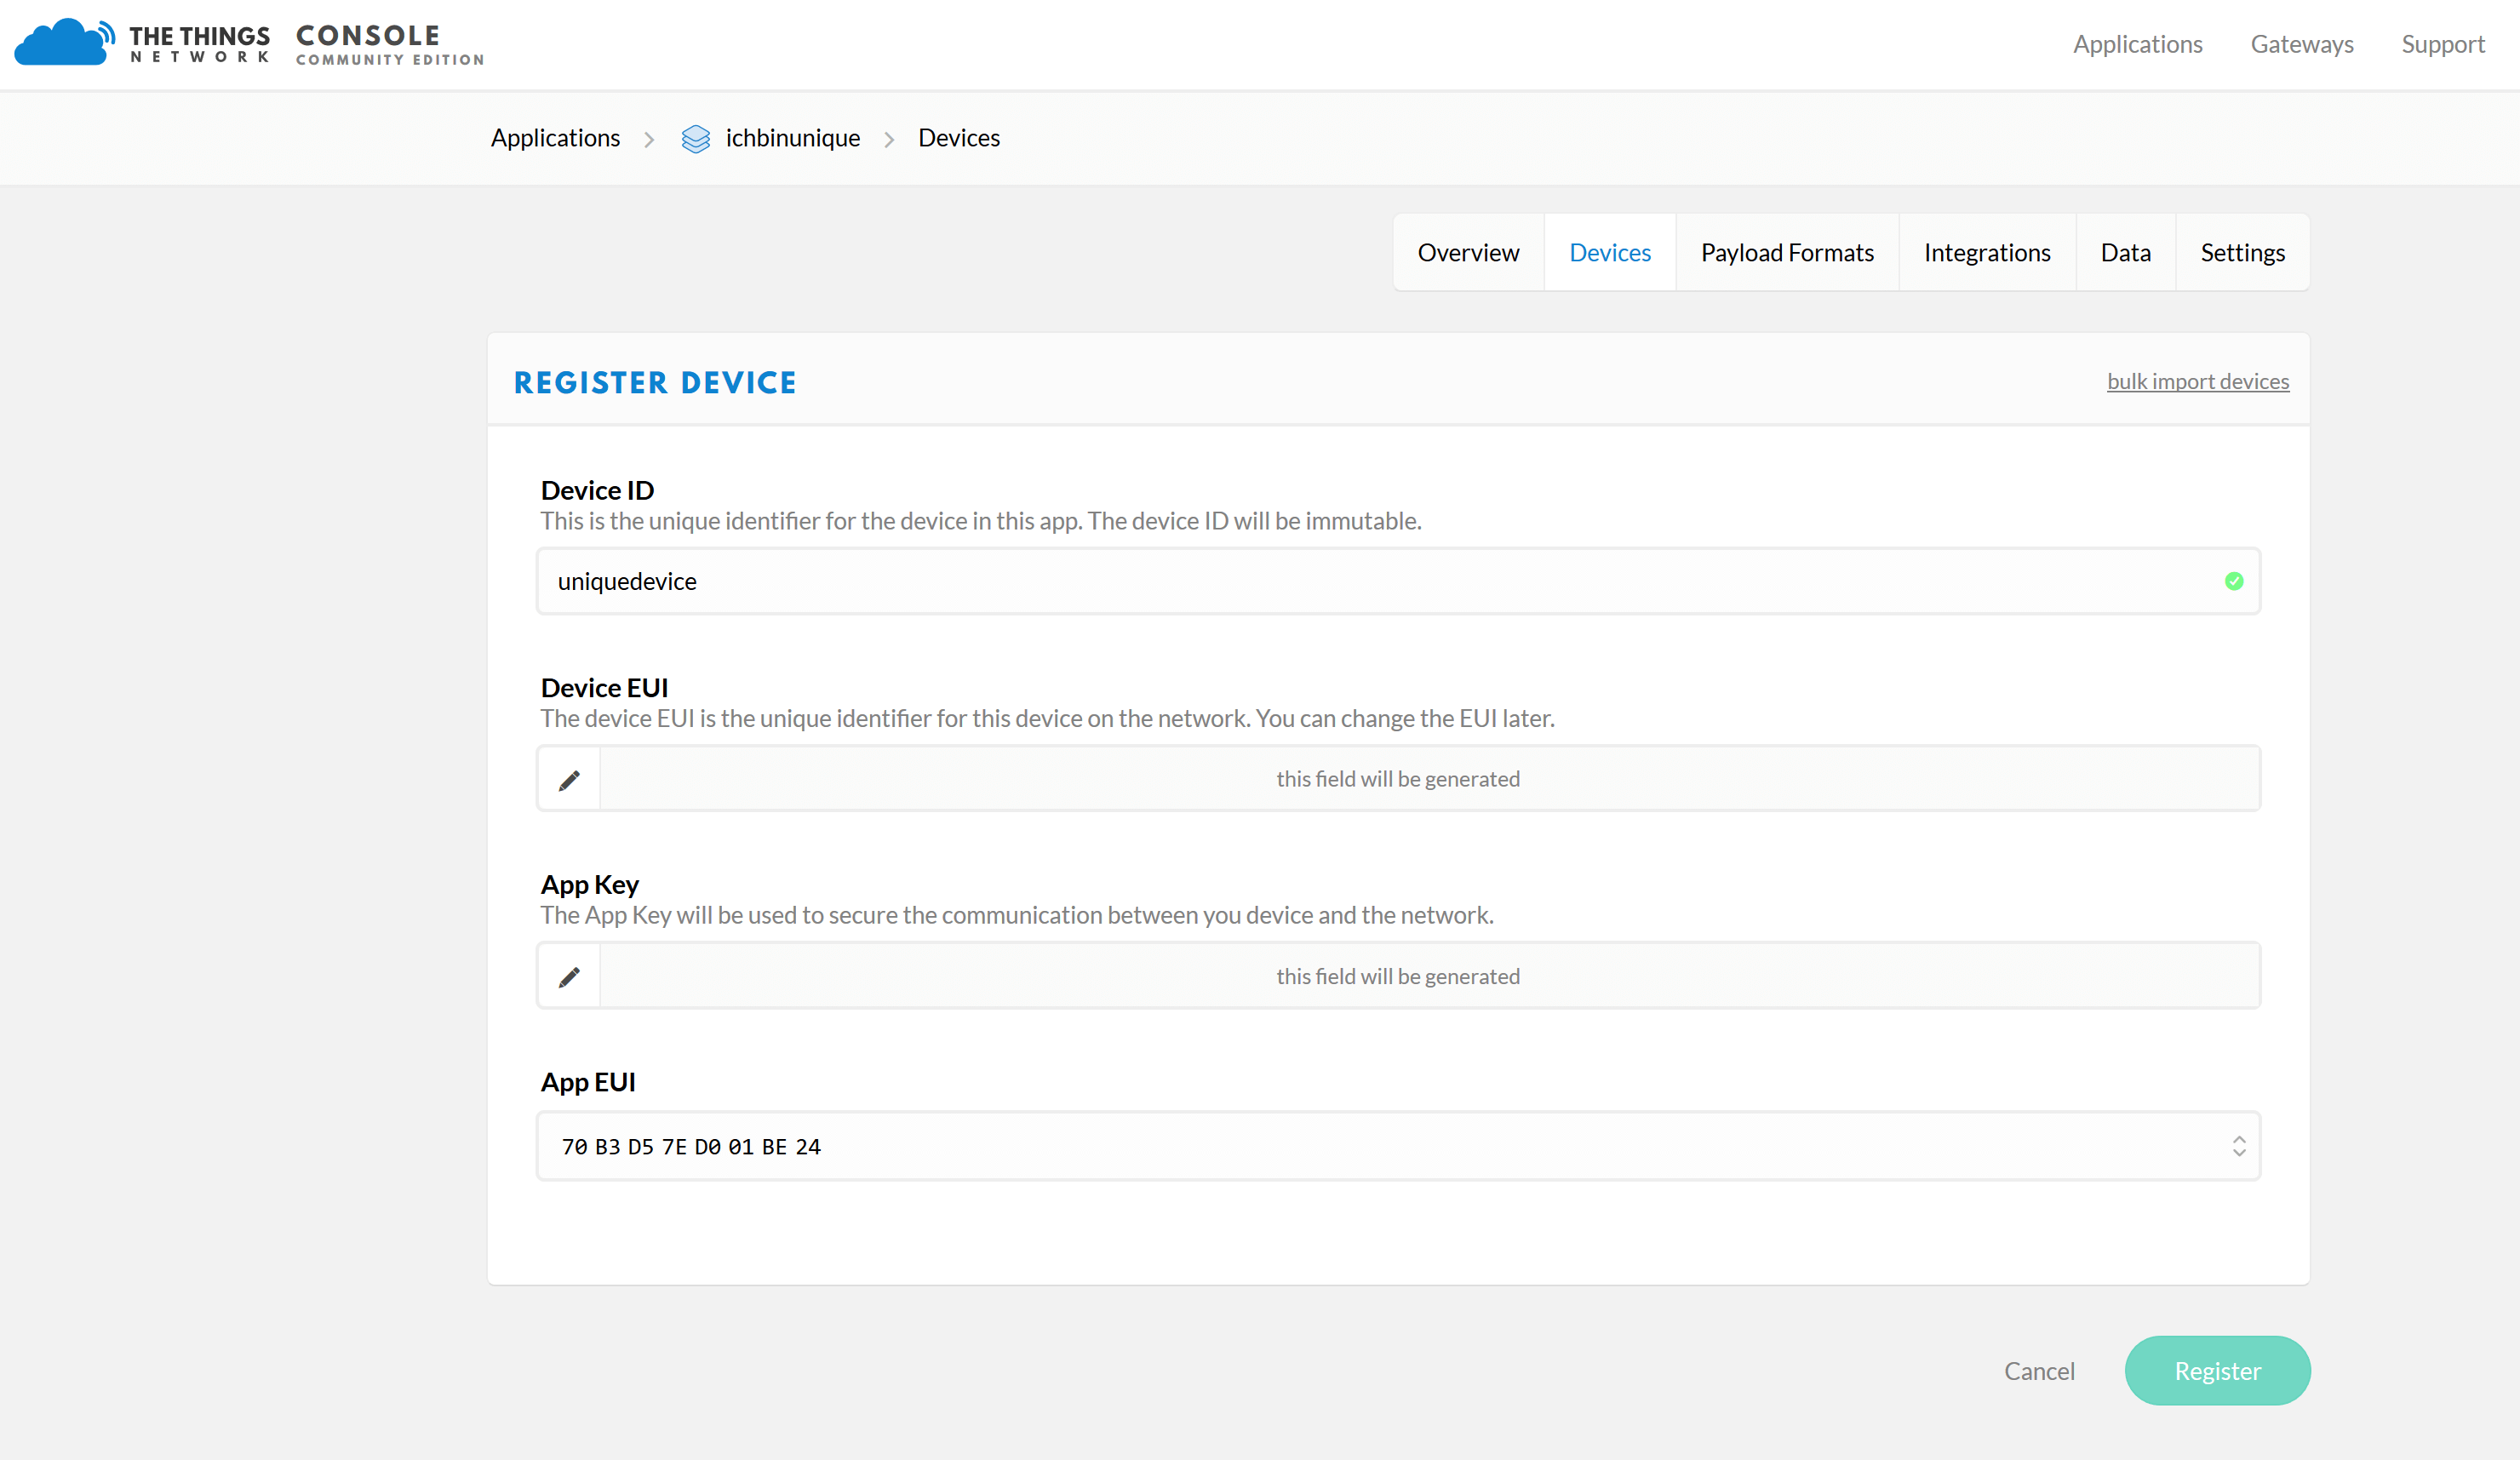
Then click on “Register” and you will get the following overview with the “Application ID” and the “Device ID”, which you will need when registering on the openSenseMap.
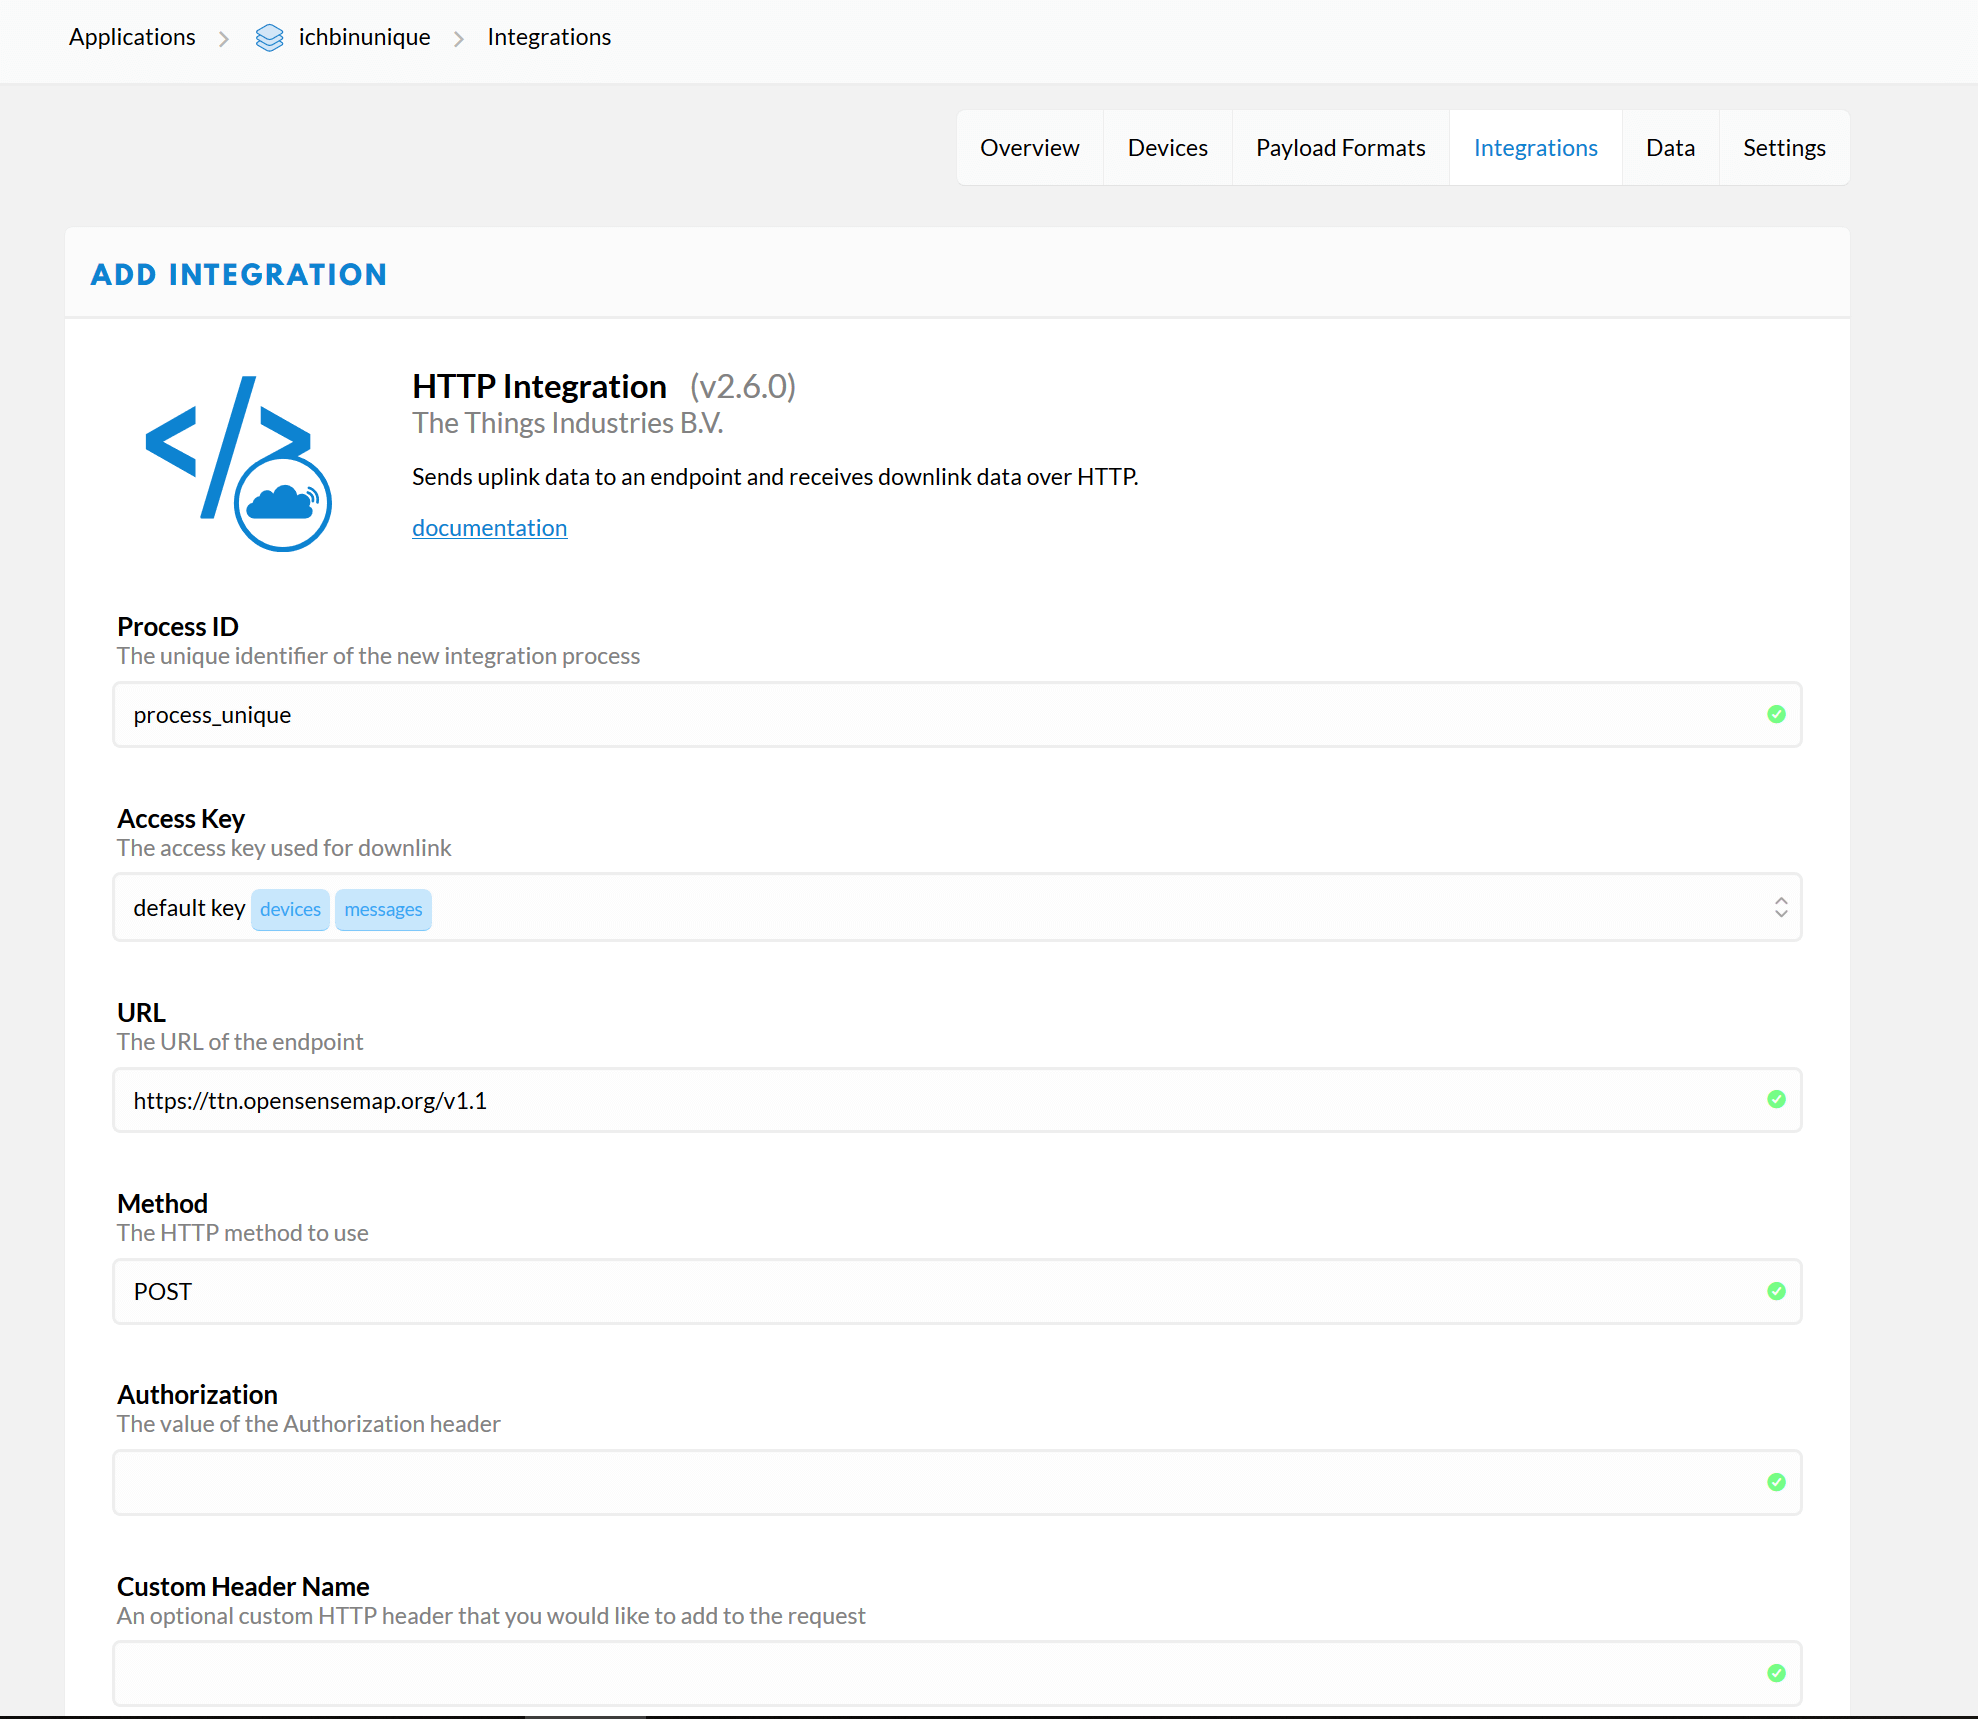
Since the data is to be sent to the openSenseMap later, you still need a so-called “integration”. You can find it in your menu above. Click on it and then click on the button with the label “Add Integration”. There you have the possibility to add various integrations to forward the data from TTN to other services. Select the “HTTP Integration” there. Now enter a “Process ID”, which you can choose freely. Then select “default key” in the dropdown menu at “Access Key”. Finally you have to specify where the data should be sent to, the URL: https://ttn.opensensemap.org/v1.1 and then click on “Add Integration”.
Registration on the openSenseMap
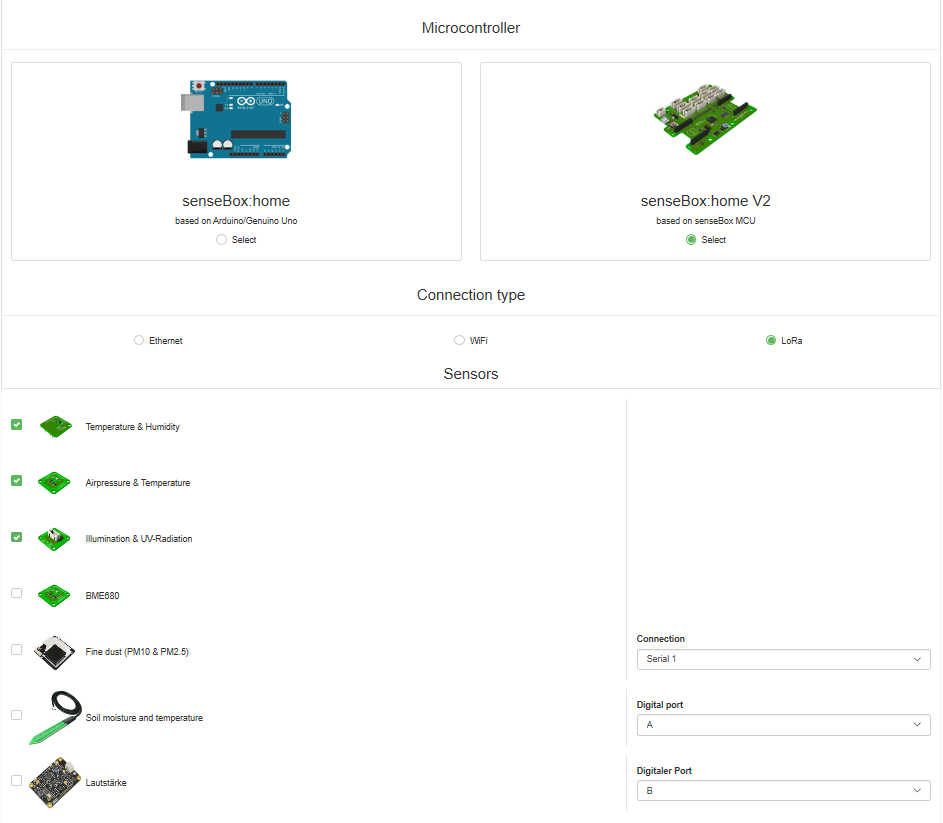
If you do not have an account yet, register on the openSenseMap and create a new senseBox. Accept the privacy policy and give the station a name. Indicate if the station is located inside or outside. Choose your location and then select “senseBox:home V2” in the hardware section. Then choose your setup with LoRa-Bee and the sensors you are using.
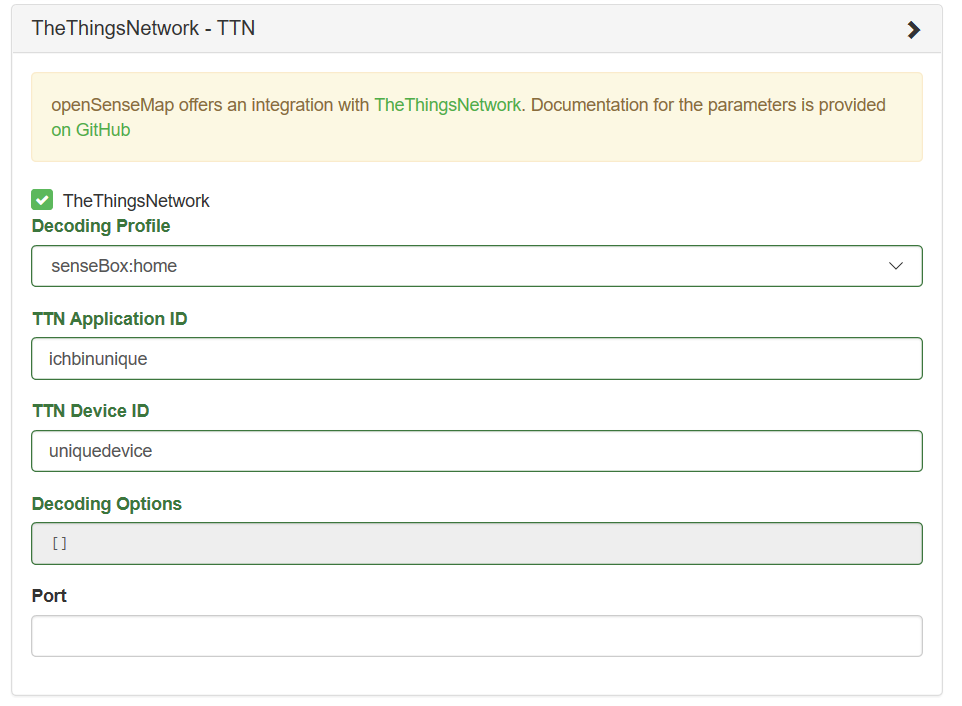
Since you have chosen the LoRa-Bee, the section TheThingsNetwork - TTN will open automatically. There you have to enter the “Application ID” and the “Device ID” as you have defined them for TTN.
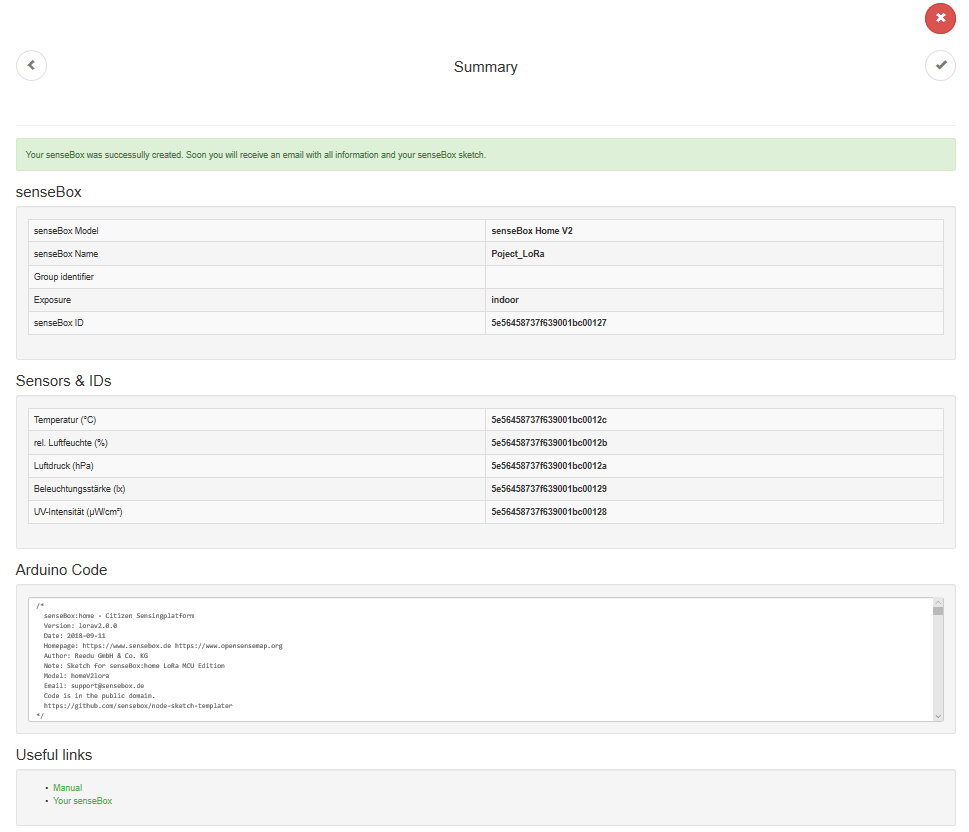
You will then come to an overview page where you can click on “Finish” and you will receive a summary. In this summary you will also find the Arduino code, which is already prepared for your station.
Settings in the Arduino IDE
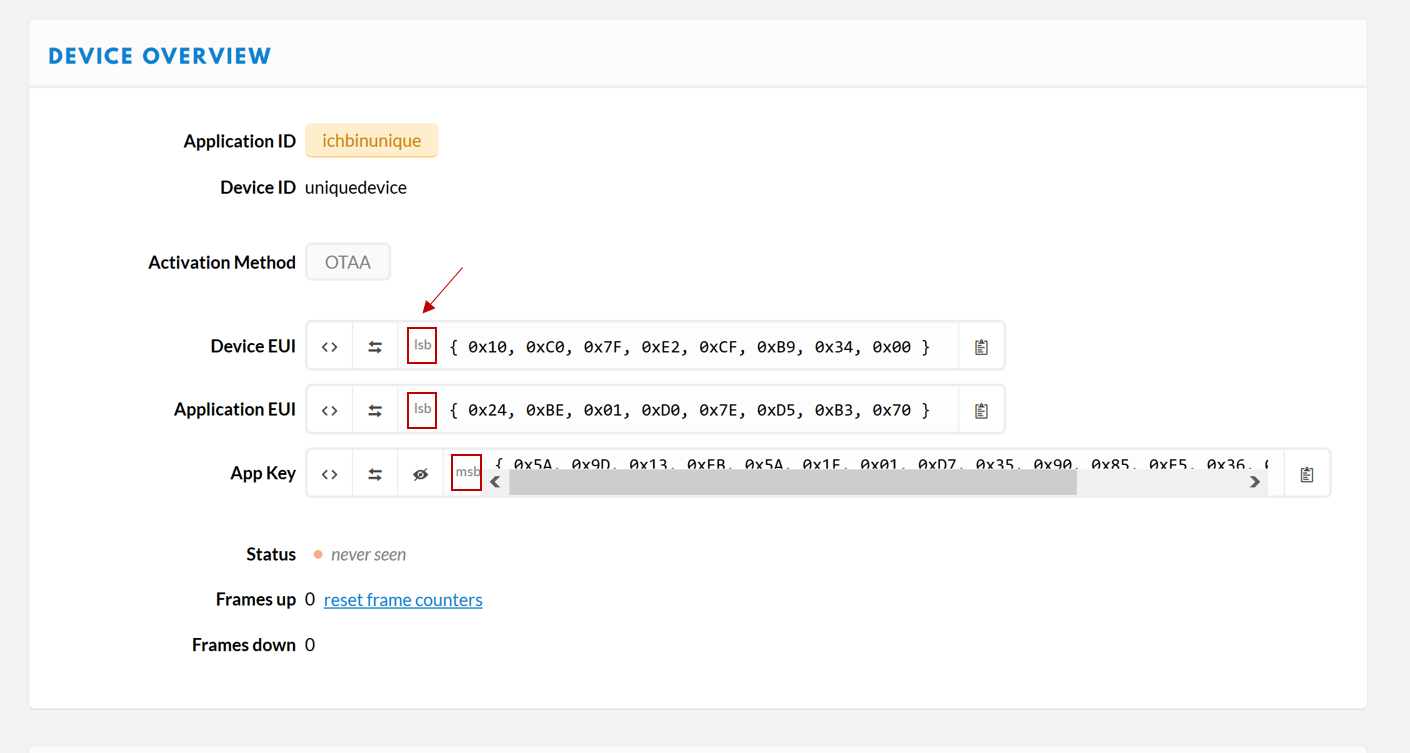
Now open Arduino and copy the generated code of openSenseMap into the programming environment. Scroll to the place in the code where you have to enter the keys “DEVEUI” the “APPEUI” and the “APPKEY”.
// This EUI must be in little-endian format, so least-significant-byte (lsb)
// first. When copying an EUI from ttnctl output, this means to reverse
// the bytes.
static const u1_t PROGMEM DEVEUI[8]={0x10, 0xC0, 0x7F, 0xE2, 0xCF, 0xB9, 0x34, 0x00 };
void os_getDevEui (u1_t* buf) { memcpy_P(buf, DEVEUI, 8);}

// This EUI must be in little-endian format, so least-significant-byte (lsb)
// first. When copying an EUI from ttnctl output, this means to reverse
// the bytes. For TTN issued EUIs the last bytes should be 0xD5, 0xB3,
// 0x70.
static const u1_t PROGMEM APPEUI[8]={ 0x24, 0xBE, 0x01, 0xD0, 0x7E, 0xD5, 0xB3, 0x70 };
void os_getArtEui (u1_t* buf) { memcpy_P(buf, APPEUI, 8);}

// This key should be in big endian format (msb) (or, since it is not really a
// number but a block of memory, endianness does not really apply). In
// practice, a key taken from ttnctl can be copied as-is.
// The key shown here is the semtech default key.
static const u1_t PROGMEM APPKEY[16] = { 0x5A, 0x9D, 0x13, 0xEB, 0x5A, 0x1F, 0x01, 0xD7, 0x35, 0x90, 0x85, 0xE5, 0x36, 0x18, 0x10, 0x6C };
void os_getDevKey (u1_t* buf) {  memcpy_P(buf, APPKEY, 16);}
As you can read in the description of the code, it is important here to use the format of the keys correctly. The “Device EUI” and the “Application EUI” are stored in
lsb format copied and pasted. The AppKey in msb format.
When copying the keys you must therefore make sure that your Device Overview is set up as shown in the following picture. You can change the format of the display by pressing the icons at the beginning (<> and ->)
Now you can transmit your code and your senseBox will transmit data to TTN and to the openSenseMap.