
IoT Measurement station
The aim of this project is to set up a senseBox environmental station. At the end the measurement of various environmental phenomena like temperature, humidity, brightness and air pressure, as well as the publication of the data on the openSenseMap, will be possible!
Setting
Connect the sensors of your choice to the I2C connectors of the senseBox MCU using the supplied JST cables.
Preparation
Step 1: Registration on the openSenseMap
To enable you to retrieve the values of your measuring station from anywhere, the values can be uploaded to the openSenseMap on the Internet. For this purpose, a user account must be created on this platform. Call up the openSenseMap in an Internet browser. Click on the menu item “Registration” in the upper bar. Fill in all free fields. Make sure to enter your e-mail address correctly, as you will need it for the next steps.
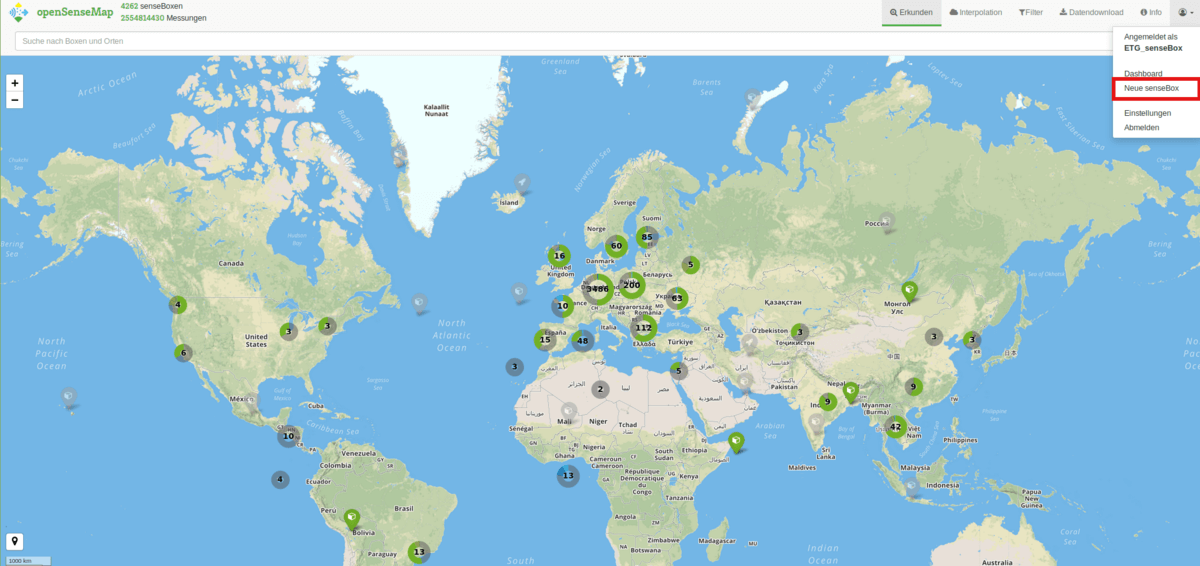
Step 2: Creating a new ‘senseBox’
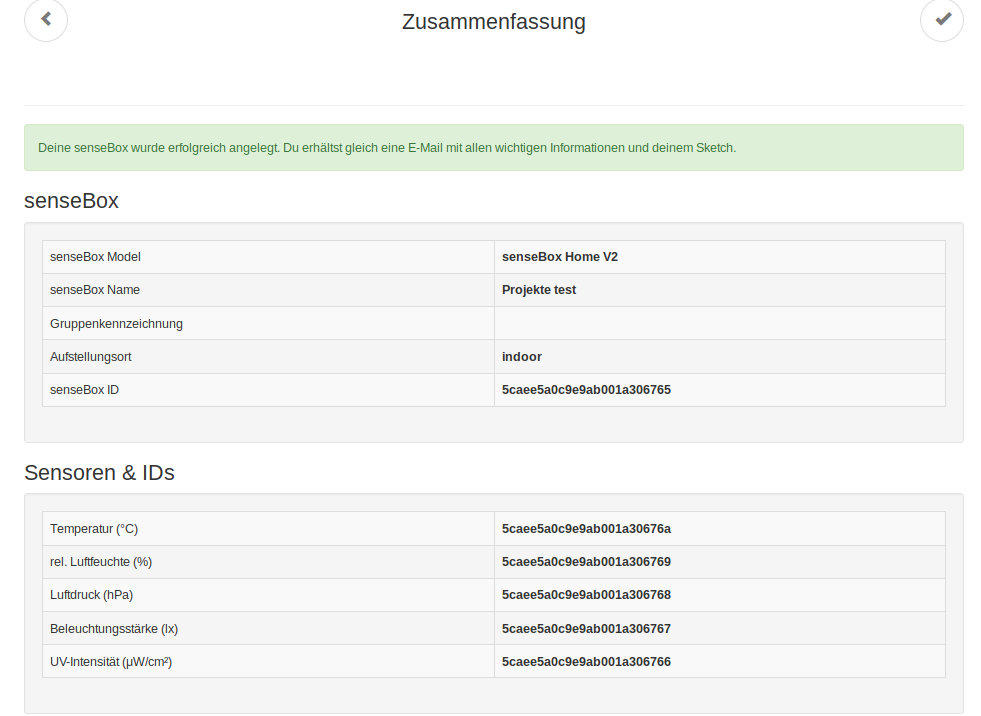
Once the registration is complete, log in and select “New senseBox” from the drop-down menu (see picture). Here you can give your measuring station a name, enter a position and determine the phenomena you want to measure. It is important that you only enter the sensors that you have available. After this is done, you will see an overview of your registered senseBox with the corresponding sensors.
Programming
Step 1: Start of programming
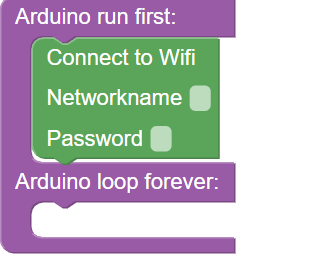
Great, the registration on the openSenseMap is finished! Now you can devote yourself to programming. Go to the Ardublockly page for this. You should know how to use Ardublockly from previous instructions. If not, visit the senseBox Go page. The first step is to connect to the Internet via WiFi. For this you need the name and password for the WLAN you want to use for uploading data. The blocks used for this can be found in the category ‘Web’-> ‘WiFi’.
Step 2: Connection to openSenseMap and upload of measured values
If you have entered the correct network name and password, a connection to the openSenseMap can now be established. To avoid overloading the network, the readings are transmitted every 60 seconds. You will find the appropriate block for this in the category ‘Time’. Drag it into the endless loop and change the measurement interval to 60000 milliseconds. Now a connection to openSenseMap should be established every 60 seconds. You can find the block for this in the category ‘Web’ -> ‘openSenseMap’. Similar to the connection via WiFi from step 1, you have to enter your senseBox ID from step 2 of the preparation in this block. In this block you can now enter all sensors you have registered and upload them. For this you need the block ‘Send measurements to openSenseMap’ from the category ‘Web’ -> ‘openSenseMap’. The value for the sensor from the ‘Sensors’ category can now be inserted into this block.
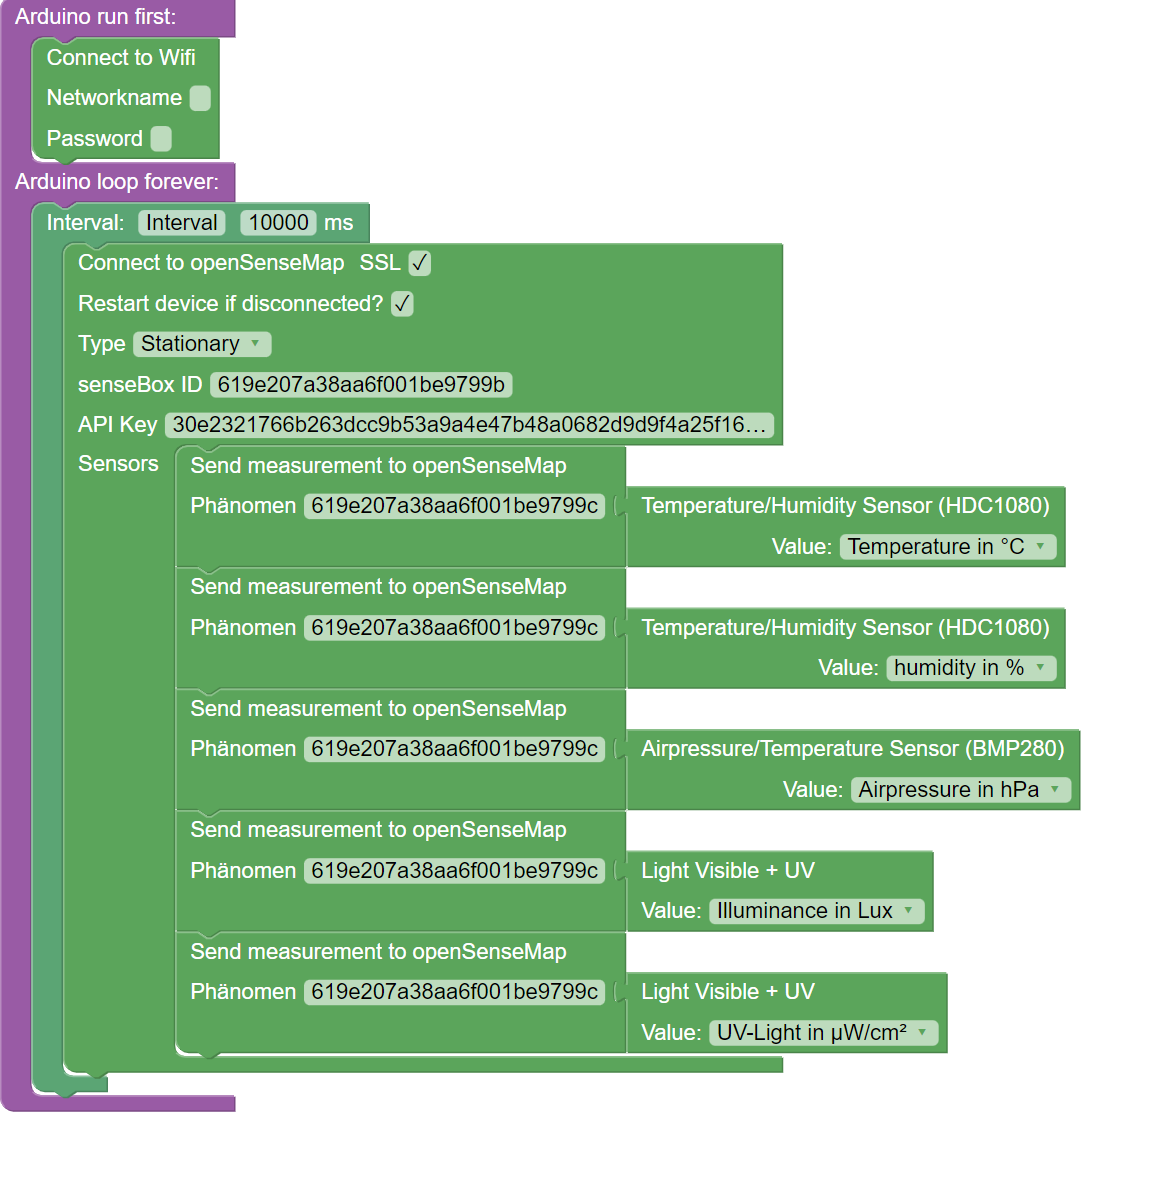
Important! Also make sure that you insert the sensor IDs in the block ‘Send measured values to openSenseMap’.
Step 3: Transfer Code
Transfer the code to the senseBox as described on senseBox Go.
Step 4: Ready!
Congratulations! You’ve programmed your own measuring station. What else you can use the senseBox for, you can find out in other exciting projects.
Entire Code
You can find the finished Blockly Code here.