
First setps: Your first Sketch
The goal of this project is to get to know Blockly and to make the LED on the senseBox MCU flash with a first sketch.
Programming
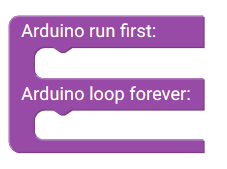
Step 1: Setup und Loop
This block is loaded directly when you start the interface and should always be used. The two basic functions Setup() and Loop() are always needed to write a working program.
All blocks within the Setup() function are only executed once at the beginning of the program. In this function the display is initialized or the WLAN connection is established for example. All blocks within the Endless Loop() function are executed continuously. The microcontroller executes all blocks again and again from the top to the bottom. In the ‘endless loop’, for example, the sensors are read out or the measured values are stored or transferred to the SD card.
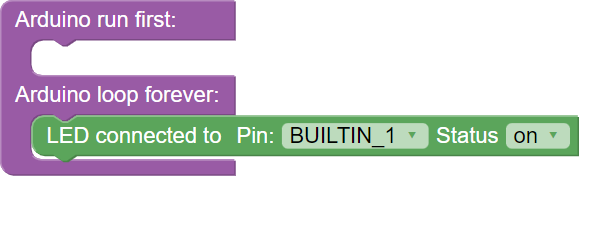
Step 2: Switch on the built-in LED
To turn on the built-in LED, you have to pull the ‘LED on digital’ block into the endless loop. Then select “BUILTIN_1” in the PIN and “On” in the Status.
Step 3: Let the built-in LED flash
To make the built-in LED flash, it is necessary to switch it off again with another ‘LED on digital’ block. In addition, a pause must be inserted after switching on and off so that the flashing is visible at all. You can find the ‘Waiting’ block in the category ‘Time’.
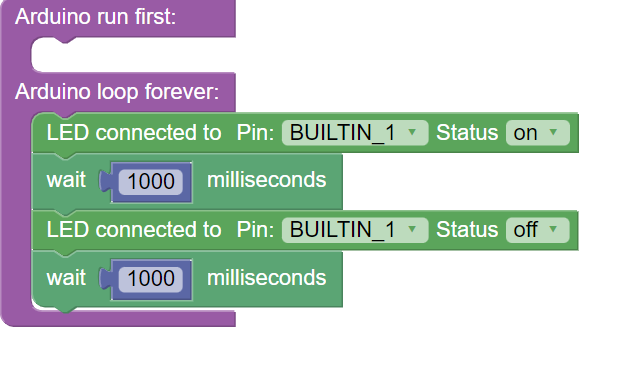
Entire Code
Check out the Blockly code.